- Create a room: give the room a name and choose the source language, the language that will be spoken (section 2).
- Run a sound check: choose your microphone, check the level and listen to the incoming signal once through headphones (section 3).
- Share access: open "QR & Downloads" and share the QR code, the link, the presentation slide or the flyer with your guests (section 2).
- Enter the room and choose "Start translation". Translation begins automatically as soon as the first listener connects (section 4).
- Test it briefly: join as a listener with your own smartphone and say a sentence.
1 Overview
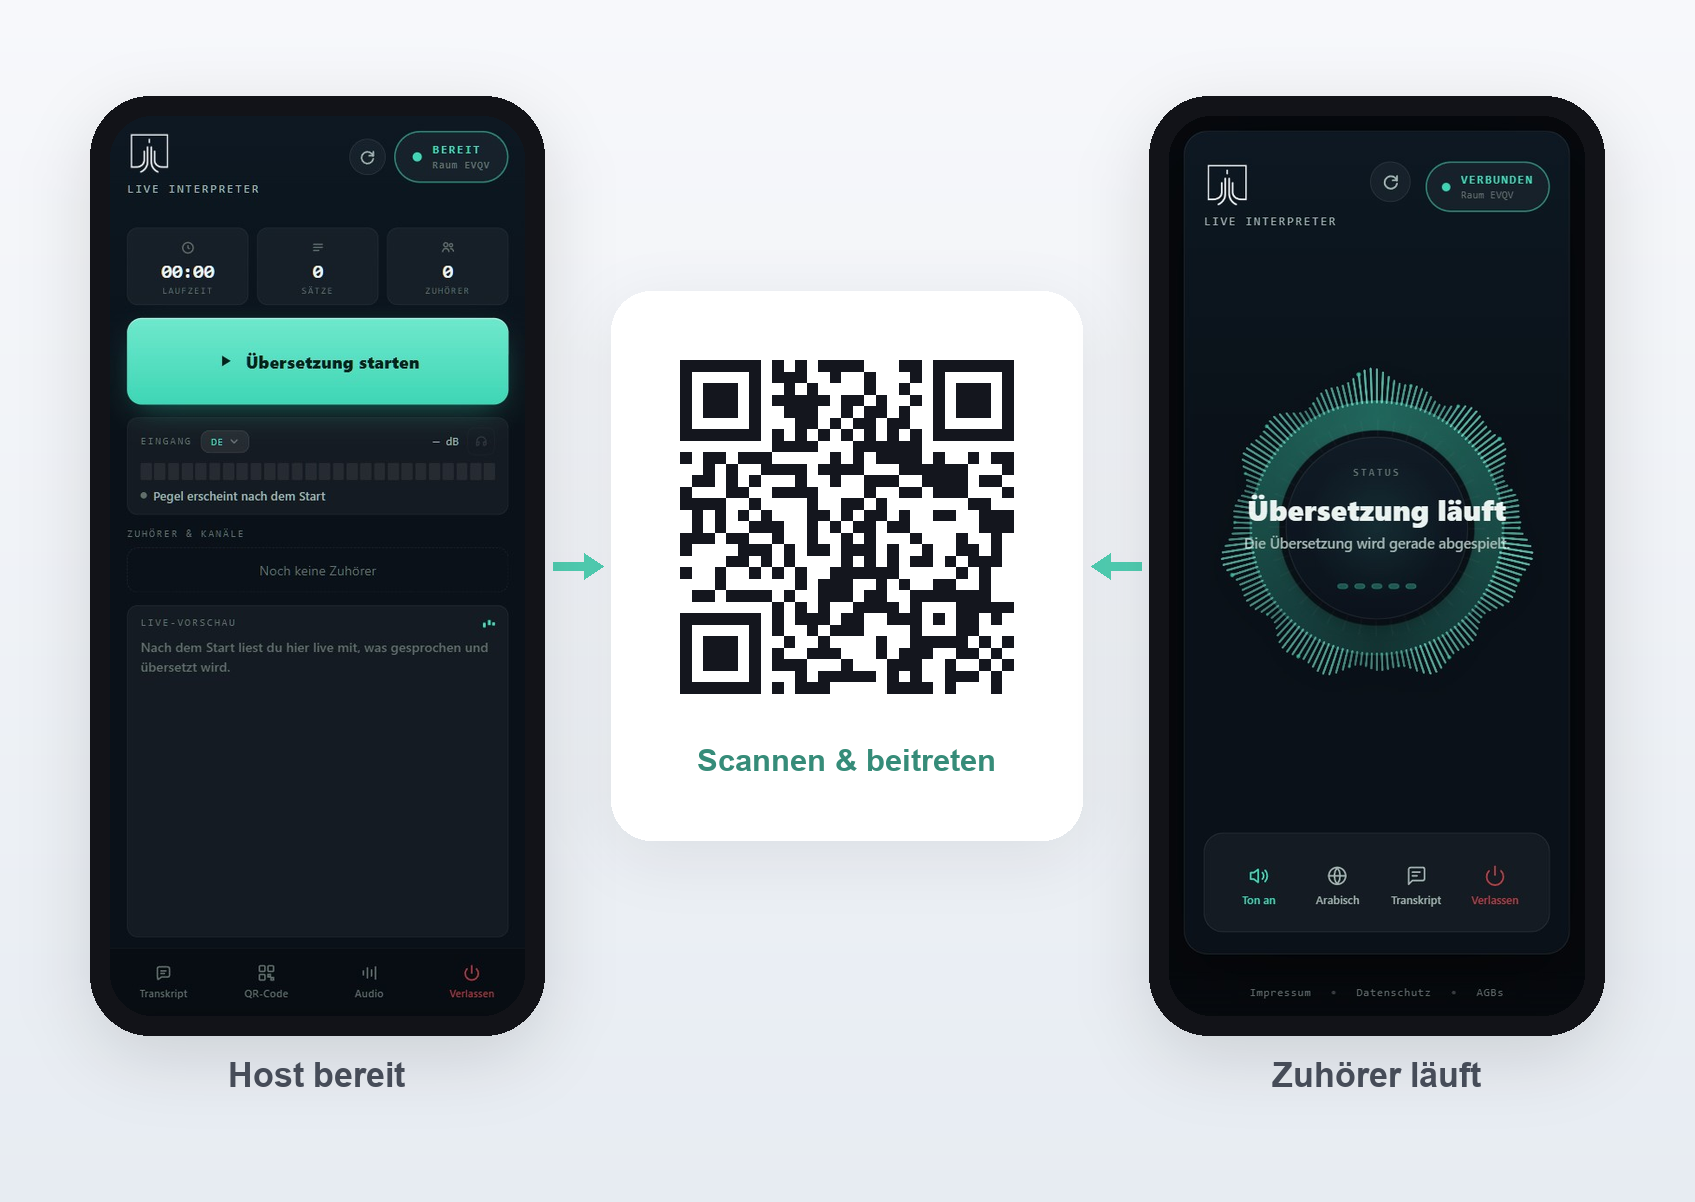
Live Interpreter has two views: one for you as the host, and one for your listeners.
The host side
This is the page where you control the translation: starting and pausing it, adjusting the audio and following the live transcript. The device you open this page on supplies the audio. Its microphone is what gets translated.
Rooms are created and configured beforehand in the admin area (section 2). That is a separate page and has nothing to do with running an event.
A laptop or tablet with a good microphone is the easiest setup. A smartphone works just as well. While the translation is running, Live Interpreter keeps the screen awake, so it will not switch off by itself. Just do not switch it off yourself: turning off the screen also ends the transmission.
The listener side
Your listeners open Live Interpreter on their own smartphone, choose their language and hear the translation through headphones. They do not need to install an app.
Section 6 shows how the listener side works and what your guests see there.
The room
Host and listeners meet in a room. Every room has its own room code (a short
sequence of letters such as EVQV) and a QR code. Your listeners join with
either one: by scanning the QR code, or by typing the code on the listener page.
The code and the QR code stay valid permanently. Posters, flyers or presentation slides for the same room can therefore be reused again and again.
You can create several rooms for different events and give each of them its own settings (section 8).
2 Creating and sharing a room
- Sign in. You land in the admin area automatically. This is where you see all of your rooms.
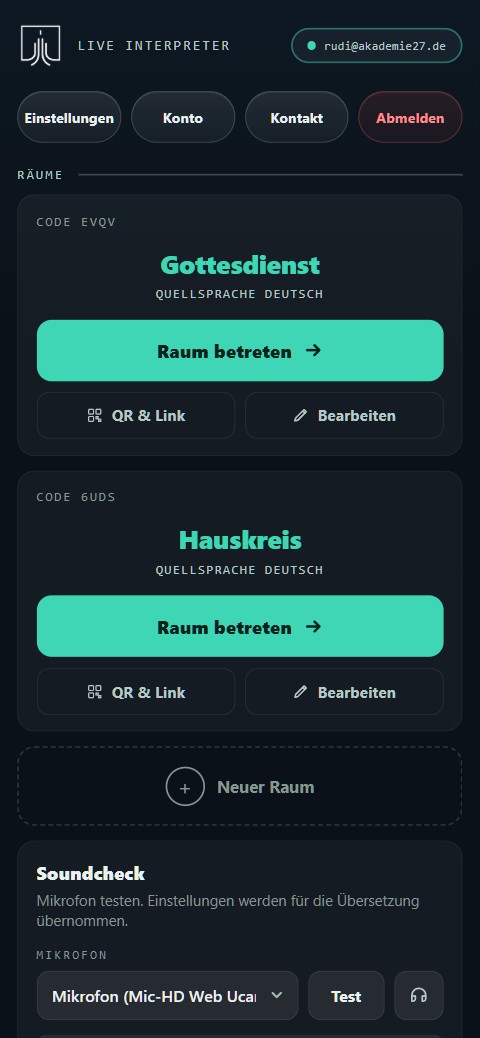
The admin area with your rooms and the sound check. - Choose "+ New room". Give the room a name and choose the source language, the language that will be spoken.
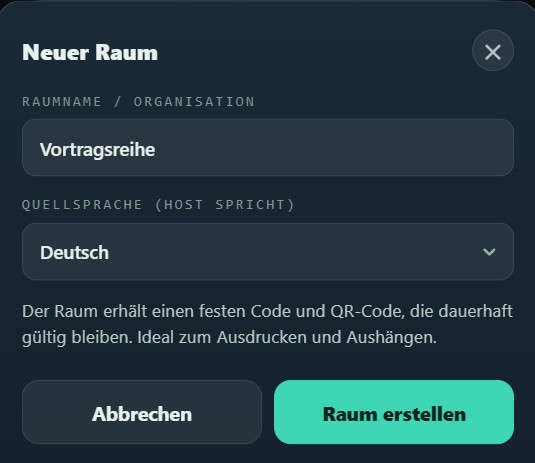
Creating a new room: name and source language. - Open "QR & Downloads" on the room. There you will find everything you need to give your guests access to the translation:
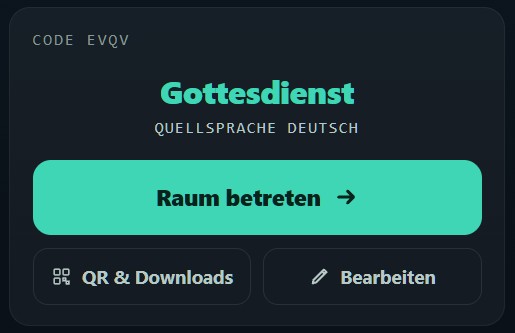
The room's QR code, with the room code and a direct link to copy. - QR code as PNG, SVG or PDF. For posters, displays or your own printed material. SVG and PDF can be enlarged to any size without losing quality.
- Presentation slide in 16:9 format as PNG, PDF or PowerPoint. Ideal for showing on screen before the event starts.
- Flyer as PNG, PDF or PowerPoint. For printing and handing out, for example in the entrance area. The layout suits A4 and A5.
The slide and the flyer are deliberately in English, so that guests who do not speak your language can follow the instructions too.
If you want to adapt the material, use the PowerPoint version. Text and images can be edited directly there, so you can add your own logo, include the name of your event or reword individual phrases.
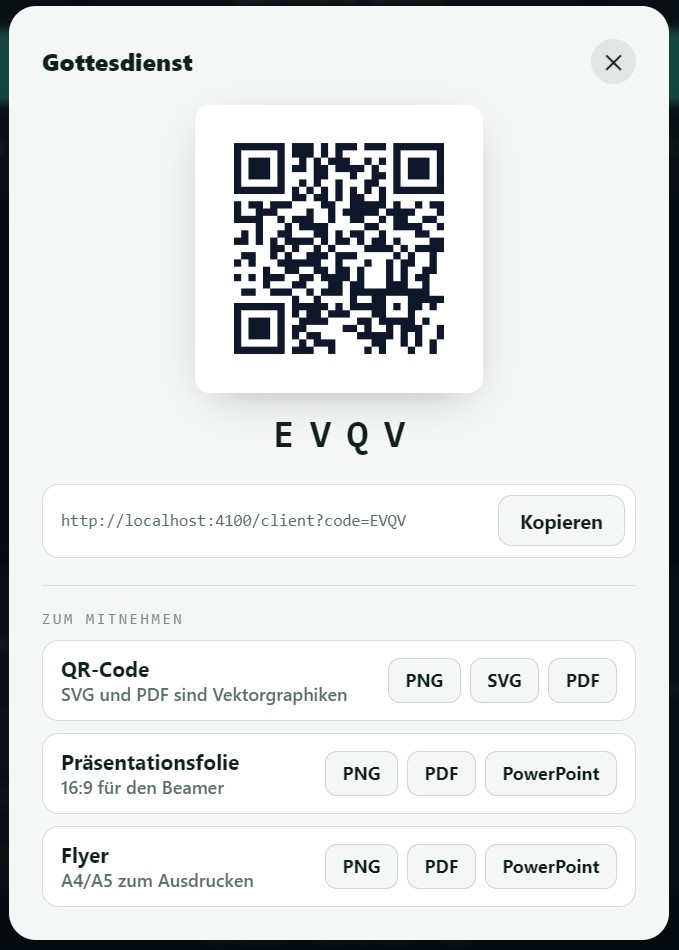
Ready-made material to share: QR code, slide and flyer, each in three formats. - Use "Edit" to open the room's settings. Here you can change the name and the source language, set the voice, reserve languages in advance, override the terminology and context for this room only, give staff members access or set up API control. This is also where you delete the room permanently if you need to. The individual settings are explained in section 8.
3 Sound check: preparing the audio
Good audio is the single most important condition for a good translation. The clearer the incoming signal, the more reliably Live Interpreter can recognise and translate what is being said.
Take a little time for this the first time you use it. Your settings are saved and apply to every later event as well, so you do not have to repeat the sound check each time. It is worth doing again when something about your setup changes: a different microphone, a different room, a different device.
You will find the sound check in the admin area. It opens your microphone and processes the signal exactly as it would during a running translation, so you can check in advance whether the microphone, the level and the sound quality are right. Nothing is transmitted to listeners and no credit is used.
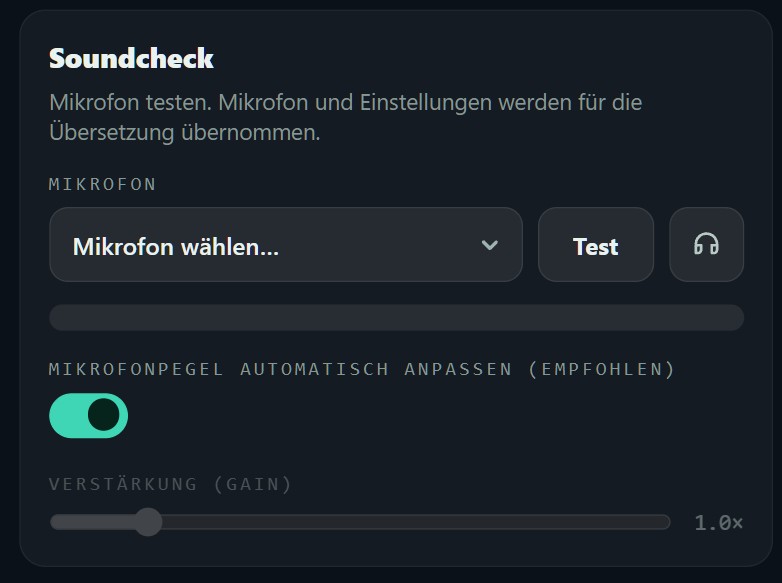
Choosing a microphone
Wherever possible, use a microphone close to the person speaking, such as a clip-on or headset microphone. Alternatively you can take a fixed output from your mixing desk. Built-in laptop microphones usually give noticeably worse results from any distance.
You can choose the microphone in two places: here in the sound check before you begin, and later in the running room under Audio (section 5).
Adjusting the microphone level automatically
"Adjust microphone level automatically (recommended)" is switched on by default and is the best setting for most situations. Live Interpreter evens out differences in volume by itself: quiet passages are lifted, loud ones are damped. That helps when a speaker steps away from the microphone for a moment, or speaks at varying volume.
While the automatic adjustment is active, the "Gain" slider is greyed out, because the level is being set automatically.
If you use a professionally levelled sound system and do not want any extra adjustment, you can switch the function off. The slider then becomes active and can be set between 0.5× and 4×; the default is 1.0×.
Background filter
In addition, a background filter is always active. It helps to separate speech from music and room noise. This is particularly useful with quiet speech, applause, murmuring in the room, or when someone speaks over music that is playing.
The filter works automatically, is independent of the automatic level adjustment and cannot be switched on or off.
Setting the level correctly
Use the level meter to set the incoming signal rather than going by ear. The meter tells you directly whether the signal is right:
Listening to the incoming signal
The headphone icon lets you hear what actually reaches Live Interpreter: the signal after processing, exactly as speech recognition receives it. That quickly tells you whether the speech is clearly intelligible or whether noise is getting in the way.
Through loudspeakers the sound goes back into the microphone. That can disturb recognition or cause feedback. This applies in the sound check just as much as in the running room.
The sound check tests the audio. Whether it also produces good text only becomes visible in the room itself. So do a short trial run the first time:
- Enter your room and start the translation (section 4).
- Open the listener page on a second device so that the translation really runs. Nothing is translated while no listener is connected.
- Say a few ordinary sentences and follow the live transcript.
If what you say is recognised correctly there, the basis for a good translation is in place. If the recognised original already contains many errors, the cause is the audio. Go back to the sound check and improve the incoming signal first.
4 The host view: controlling the translation
- Open your room with "Enter room". That takes you to the control interface for live use.
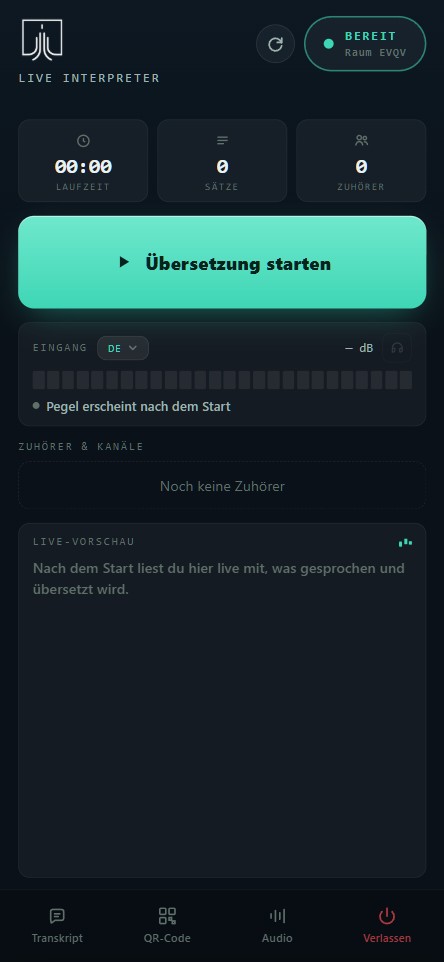
The live view before you start: the status "Ready" and the large start button. - Choose "Start translation". Translation only begins once at least one listener is connected to the room. While nobody is connected, the timer does not run and no credit is used.
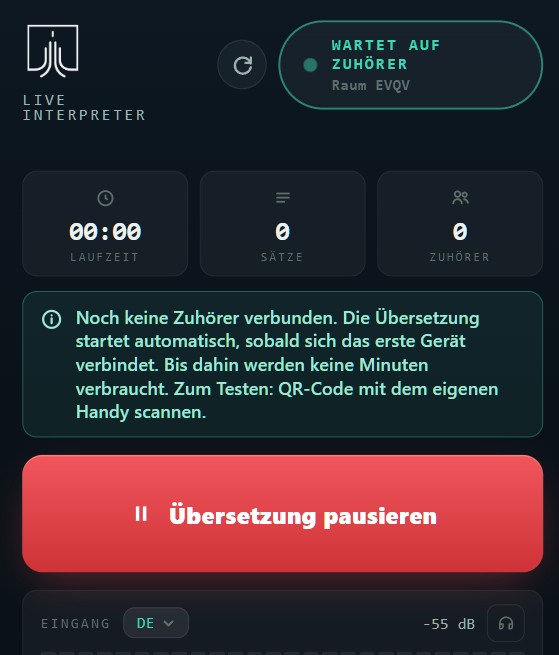
"Waiting for listeners": while nobody is connected, the timer does not run and no minutes are used. - Once the translation is running, the transcript shows you in real time what is being recognised and which languages it is translated into.
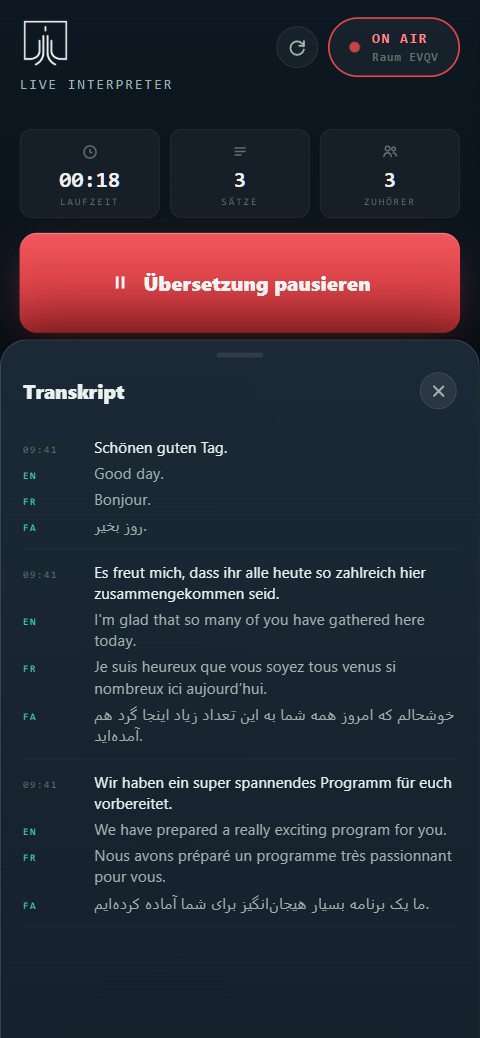
On Air: the status display, the sentence counter and the multilingual live transcript. - If you want to interrupt the translation for a while, during the worship music for example, choose "Pause translation". While it is paused nothing is translated and nothing is charged, but your listeners stay connected. "Resume translation" picks it up again.
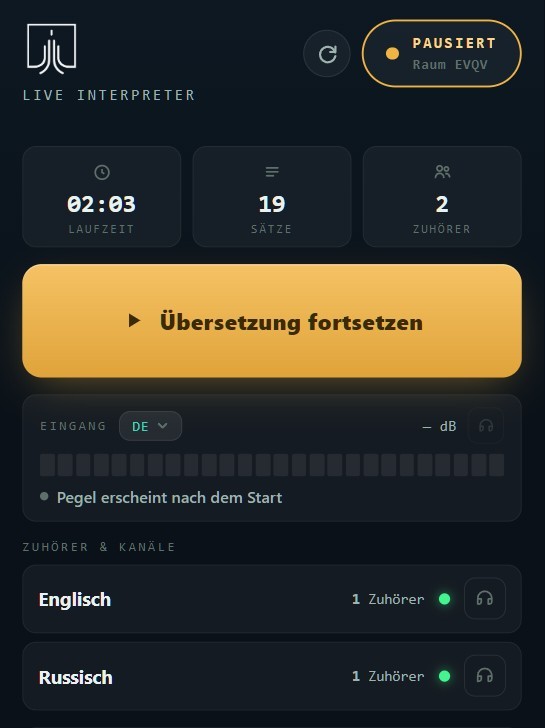
Paused: "Resume translation" restarts the stream, and your listeners stay connected. - To finish, choose "Leave" at the bottom right. You then have two options:
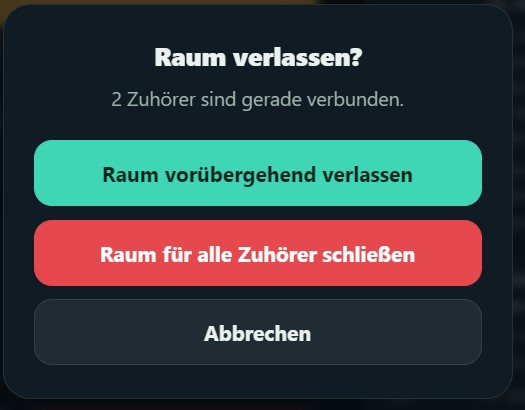
When leaving you choose whether you are only pausing briefly or ending the session for everyone. - "Leave the room temporarily": your listeners stay connected. When you come back you can pick the translation up again seamlessly.
- "Close the room for all listeners": the session is ended completely and all listeners are disconnected from the room. The room itself remains, and you can use its code and QR code again next time.
The status display
At the top of the host page you can always see the room's current state:
The "Reconnect" button
Next to the status display there is a round reconnect button. If the connection drops or something stops responding, this rebuilds it. On the host page this reloads the page. Afterwards you start the translation again with "Start translation".
5 Audio in a running room
In a running room there is a bar at the bottom with:
- Transcript (mobile view only): opens the full transcript.
- QR code: shows the room's QR code.
- Audio: the settings for the incoming signal and the voice.
- Leave: as described above, pause briefly or end the session for everyone.
Behind the Audio icon, the sound wave, are all the settings for the incoming signal and for the voice of the translation. You can change them at any time, including during a running session.
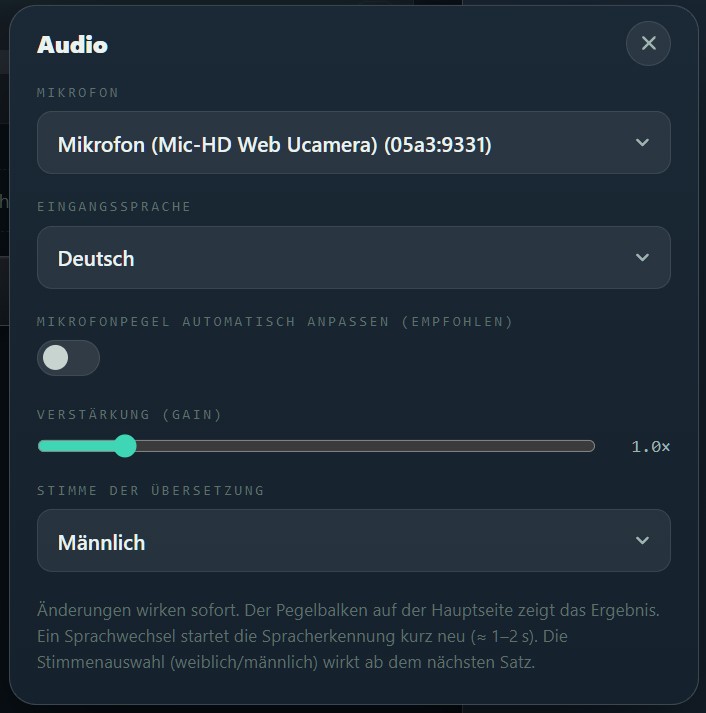
Automatic level and background filter
Both are set here exactly as they are in the sound check, where they are explained in detail (section 3): "Adjust microphone level automatically (recommended)" is switched on and greys out the "Gain" slider; the background filter always runs and cannot be switched off. You can still turn the automatic adjustment off or on in the middle of an event.
Listening to the incoming signal
As in the sound check, the headphone icon in the input level area lets you hear what reaches Live Interpreter. Use it for a quick check if something seems unusual during the event. The same rule applies here: headphones only.
The voice of the translation
You can choose whether the translation is spoken with a female or a male voice. The setting belongs to the room and applies to all of that room's languages.
You will find it in two places: here in the Audio view of the running room, and on the room under "Edit" (section 8). Both places change the same setting.
You can also switch the voice during an event. The change takes effect from the next translated sentence; a sentence that is already playing is not interrupted.
Listening to a translation
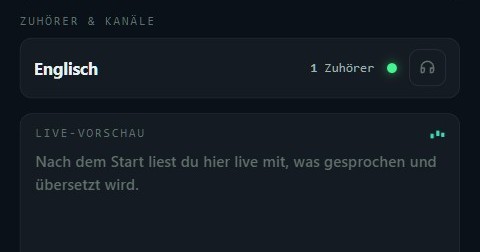
This function is only available in a running room. Under "Listeners & channels" there is a headphone icon next to every active language. It lets you hear the finished translation exactly as your listeners hear it, so you can quickly check during the event whether a language sounds right. Again: headphones only.
6 The listener view
This is what Live Interpreter looks like on your listeners' smartphones.
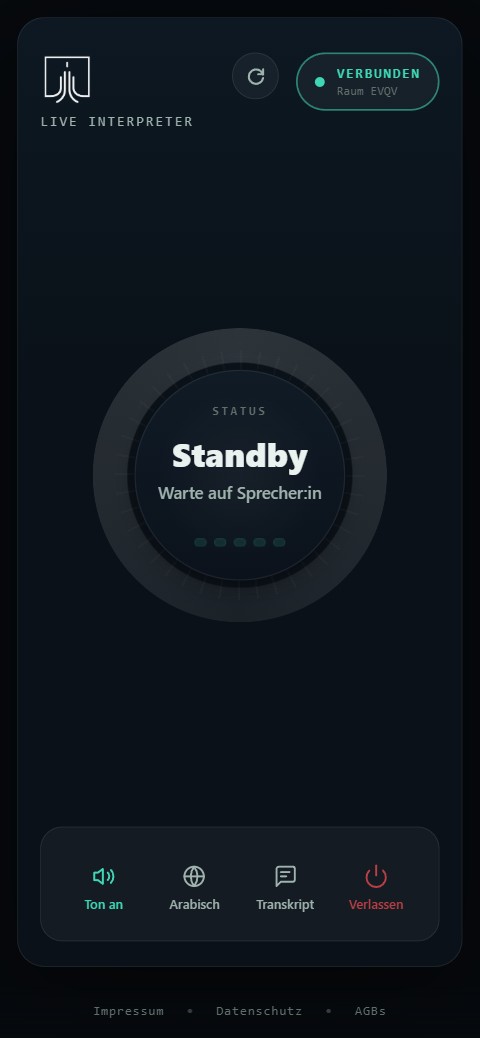
Getting started is simple:
- Scan the QR code or open the link.
- Choose a language.
- Listen to the translation through headphones.
Listening and reading along
The translation plays through the listener's headphones. Anyone who also wants to read along opens the translated text with "Transcript" and follows it live.
Anyone without headphones can mute the sound with "Sound off" and follow the translation through the live transcript alone. That way everyone can follow: by audio, by text, or by both.
Finding the right language
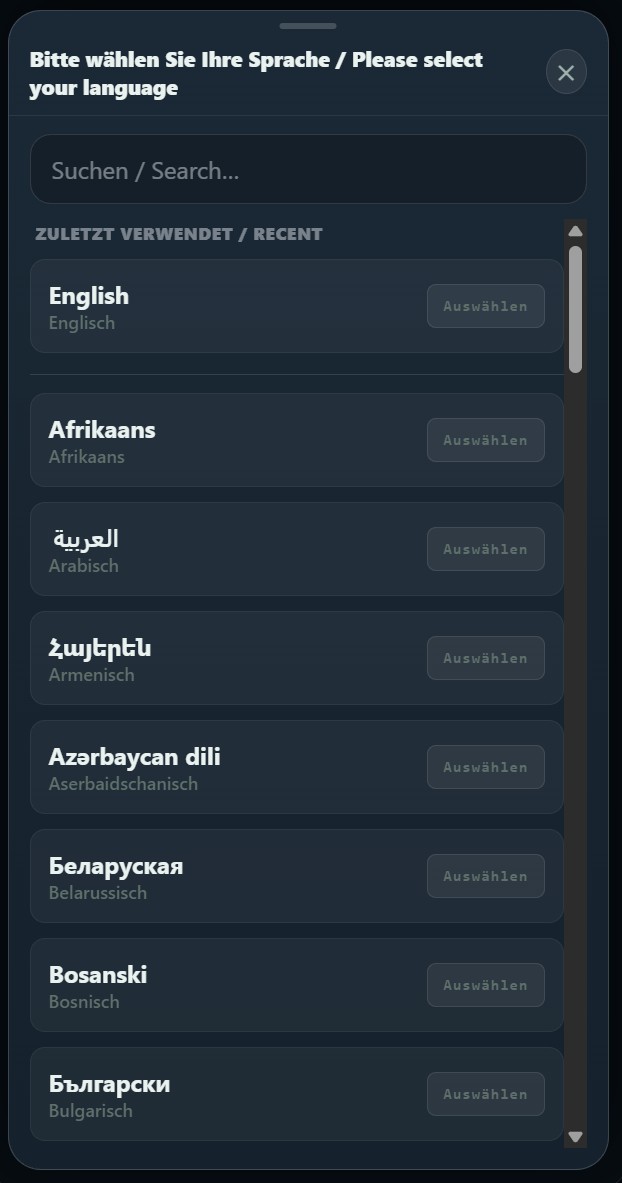
The list of languages is long, so there is a search box above it. Listeners can find their language in several ways:
- by its name in that language, for example "Español", "Polski" or "العربية",
- by its English or German name, such as "Spanish" or "Spanisch",
- or by its language code, for example "es" or "pl".
A guest can therefore search for the name they know, while a helper at the entrance can use the English name just as well.
Anyone who has been before does not need to search at all: above the list, under "Recent", are the last three languages chosen on that device. On a first visit this section does not appear. The language is deliberately not selected automatically: it is that short confirmation with a tap that allows the browser to play sound.
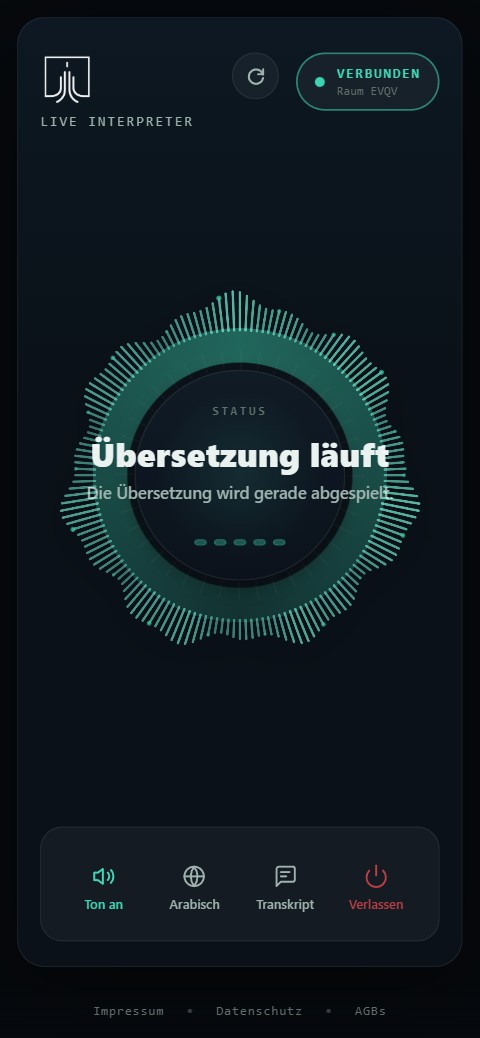
The listener's connection status
At the top of the listener page is the current connection status:
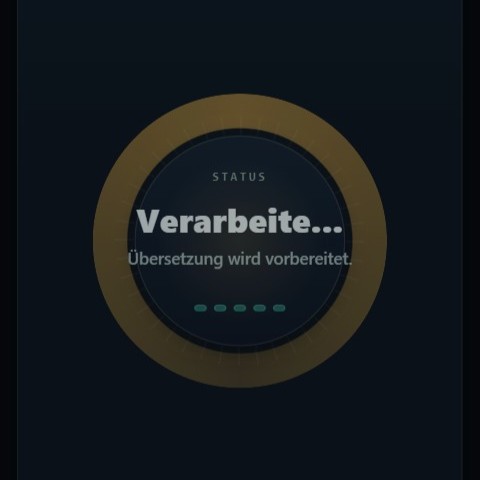
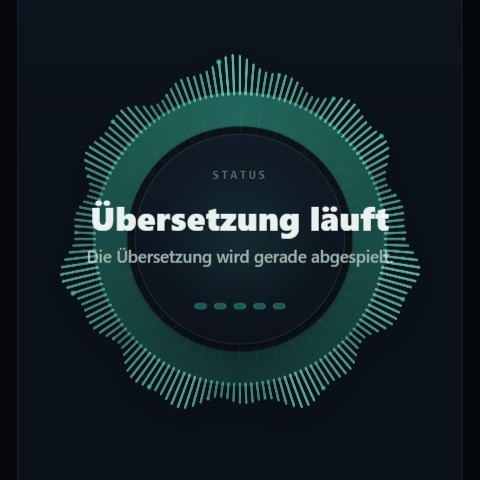
What listeners see during the translation
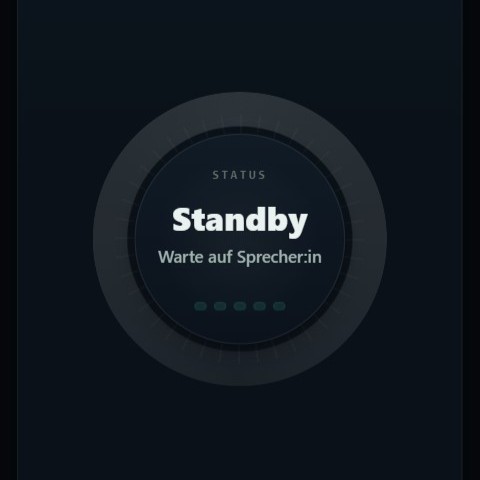
In the middle of the page, a status display shows what is happening right now:
- It is best to bring your own headphones.
- Tap the screen once after joining. Some smartphones only allow audio playback after a user action.
- Do not leave the phone lying with Live Interpreter in the background for a long time during the event. If no sound is played for an extended period, the app assumes nobody is listening any more and disconnects the device after about three minutes. "Reconnect" brings the listener straight back.
7 Settings for all rooms
Under Settings you define defaults that apply to all of your rooms.
If you need to, you can override these defaults for individual rooms later. Section 8 explains how.
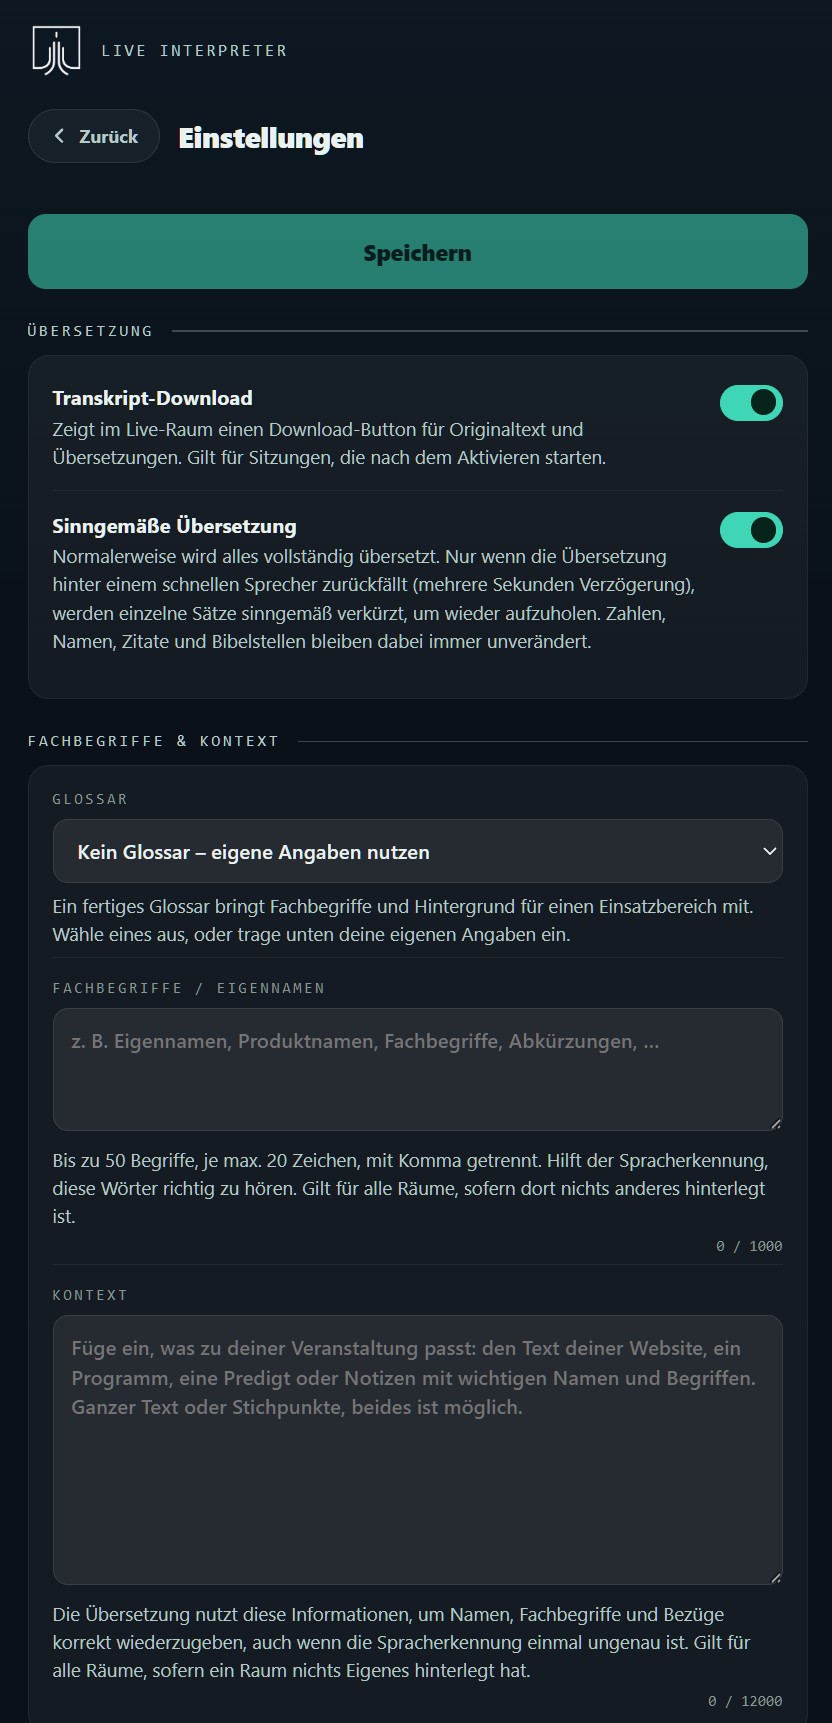
Changes only take effect when you click "Save" at the top. As long as nothing has been changed the button is inactive. As soon as you change a setting it becomes active and the note "Unsaved changes" appears. If you leave the page before saving, Live Interpreter asks you first.
Transcript download
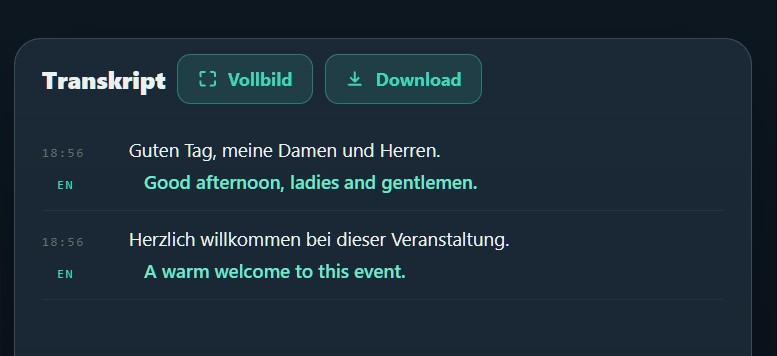
With this option switched on, a download button appears in the transcript during a running session. It downloads the complete transcript, with the original and all translations, as a .txt file.
This is useful if you want to document an event, or send us the transcript when reporting a problem. The setting applies to sessions started after it has been switched on.
With the transcript download switched on, the transcript of every session (original and all translations) is kept encrypted for 14 days under Account › Sessions, where you can download it.
After that it is deleted automatically; you can delete it there yourself before then. We do not store any audio.
Meaning-based translation
With fast speakers, the spoken translation can fall behind the original. This happens particularly when the target language needs more words for the same content.
With "Meaning-based translation" switched on, Live Interpreter starts to tighten the translation as the delay grows. The essential content is kept, while less important subordinate clauses, filler words or examples are dropped.
Two conditions have to be met for anything to be shortened: the setting is on and the listener is genuinely behind. As long as no significant delay builds up, the translation stays complete even with the setting switched on, so with a normally paced speaker it changes nothing. With the setting off, nothing is ever shortened, however large the delay becomes.
The shortening happens in stages, depending on how far behind that listener is:
- From about 8 seconds behind: the translation is tightened slightly. Subordinate clauses and filler words may be dropped.
- From about 15 seconds behind: the translation concentrates more strongly on the essential statements. Examples, longer lists and side points may be dropped.
Numbers, names, quotations and Bible references always stay unchanged.
What happens regardless of this setting
Two mechanisms work independently of "Meaning-based translation" and cannot be switched off.
The voice generally speaks slightly faster than a normal recording. If a larger delay builds up, Live Interpreter increases the pace further. The pitch stays unchanged.
There is also an upper limit on the delay. If it rises above roughly 40 seconds for a listener, a passage is skipped so that the translation catches up with what is happening now. A note appears in the transcript when this happens.
Glossary, terminology and context
With terminology and context you can prepare Live Interpreter for your event. Instead of entering everything yourself, you can also choose a ready-made glossary. That is why the glossary selection sits above the two fields.
Glossary
A glossary already contains suitable terminology and context for a particular field of use. The Biblical glossary, for example, contains book names, Bible references and commonly used theological terms.
While a glossary is selected, the two fields below it are greyed out and not used: the content comes from the glossary. The fields stay empty, because the glossary's contents sit on our server; the selection only shows you its name.
We maintain the glossaries ourselves. Improvements are therefore automatically available to everyone who uses that glossary.
If you want to enter your own content, choose "No glossary".
Terminology and proper names
This field mainly helps speech recognition. Unusual names, abbreviations, product names or specialist terms are sometimes misrecognised. If you enter them in advance, Live Interpreter can recognise and transcribe them more reliably.
You can enter up to 50 terms. Each term may be at most 20 characters long. Separate the terms with commas.
Context
The context helps with the translation itself. Here you add information that helps Live Interpreter interpret what is being said. Even if speech recognition slips up once, the translation can still be right, because the subject matter is known.
A city guide might enter information about the tour and its stops, a company content from its website, and a church the text of a sermon.
The space available here is considerably larger than for the terminology. You can paste in longer texts running to several pages.
Staff members
Under Staff you can invite other people by email. Those invited sign in with their own account, see only the rooms assigned to them, and can start sessions in those rooms.
They have no access to your account, your billing or the general settings.
Which rooms a staff member may use is defined in that room's settings under "Edit".
8 Settings per room
Normally every room takes the defaults from the general Settings. If you want a particular room to differ, open "Edit" on that room. There you define settings that apply to this room only.
Here too, changes only take effect when you click "Save" at the top.
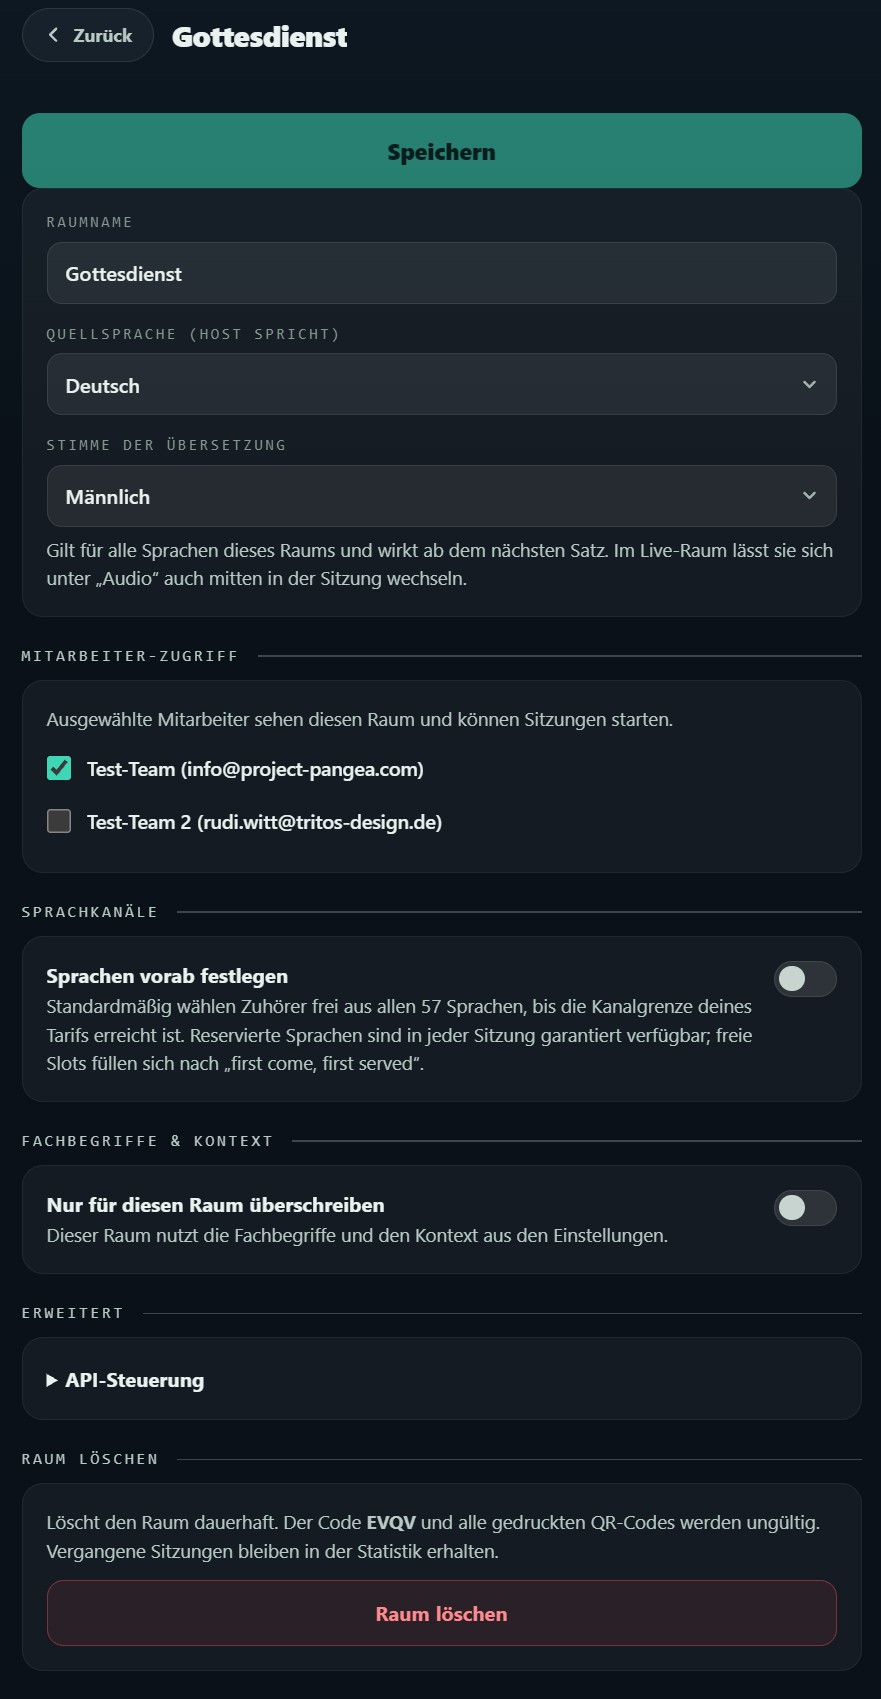
Name and source language
The name is mainly there to help you tell your rooms apart. The source language is the language that will be spoken; you can also change it during a running session under Audio.
The voice of the translation
Here you set whether the translation is spoken with a female or a male voice. The setting applies to all of this room's languages.
You will find the same choice in the running room under Audio (section 5). A change takes effect from the next translated sentence.
Reserving languages in advance
By default your listeners choose their own language until the maximum number of language channels in your plan is reached.
For planned multilingual events you can reserve particular languages in advance. Those languages are then guaranteed to be available in every session in this room. Channels that are not reserved are allocated in the order in which listeners choose further languages.
Terminology and context for this room
By default the room takes the glossary, or the terminology and context, from your general settings. The line under the switch tells you which default is currently in use, and names an account-wide glossary if one is selected.
If you want to use something different for this room, switch on "Override for this room only". You then have two options:
- "Use a glossary": choose a glossary that applies to this room only. It replaces the general default here. There are no separate fields in this case, because the glossary provides both; you only see a note about what it brings with it.
- "Set my own terminology + context": the two fields appear and you enter your own details for this room. No glossary applies to this room then, even if one is selected account-wide. If you leave one of the two fields empty, the default from the general settings applies to that field again.
If you later switch "Override for this room only" off again and save, the room goes back to using the general settings in full.
A church might therefore use the Biblical glossary by default and depart from it for a single lecture evening.
Staff access
Here you define which of your staff members may see this room and start sessions in it. The staff members themselves are invited under the general Settings (section 7).
API control
Under "Advanced" you will find API control. It lets you start or stop the translation through a link, for example from presentation software such as ProPresenter, OBS or OnSong, or from an automation tool. That way Live Interpreter can be built into existing workflows without anyone having to start or stop the translation in the browser each time.
Once activated you receive three links: start, stop and status. Each link contains a secret key, so only pass it on to people or programs that are allowed to control the room. "Regenerate" invalidates all previous links and replaces them with new ones.
API control only starts and stops the translation. The microphone signal still comes from the host page, so it has to be open for that room.
Deleting a room
At the very bottom you can delete the room permanently. This also invalidates its code and QR code: posters, flyers or presentation slides for this room that have already been handed out will no longer work.
9 Account
While Settings govern how Live Interpreter behaves, Account holds everything to do with your access, your usage and your subscription.
Translation credit
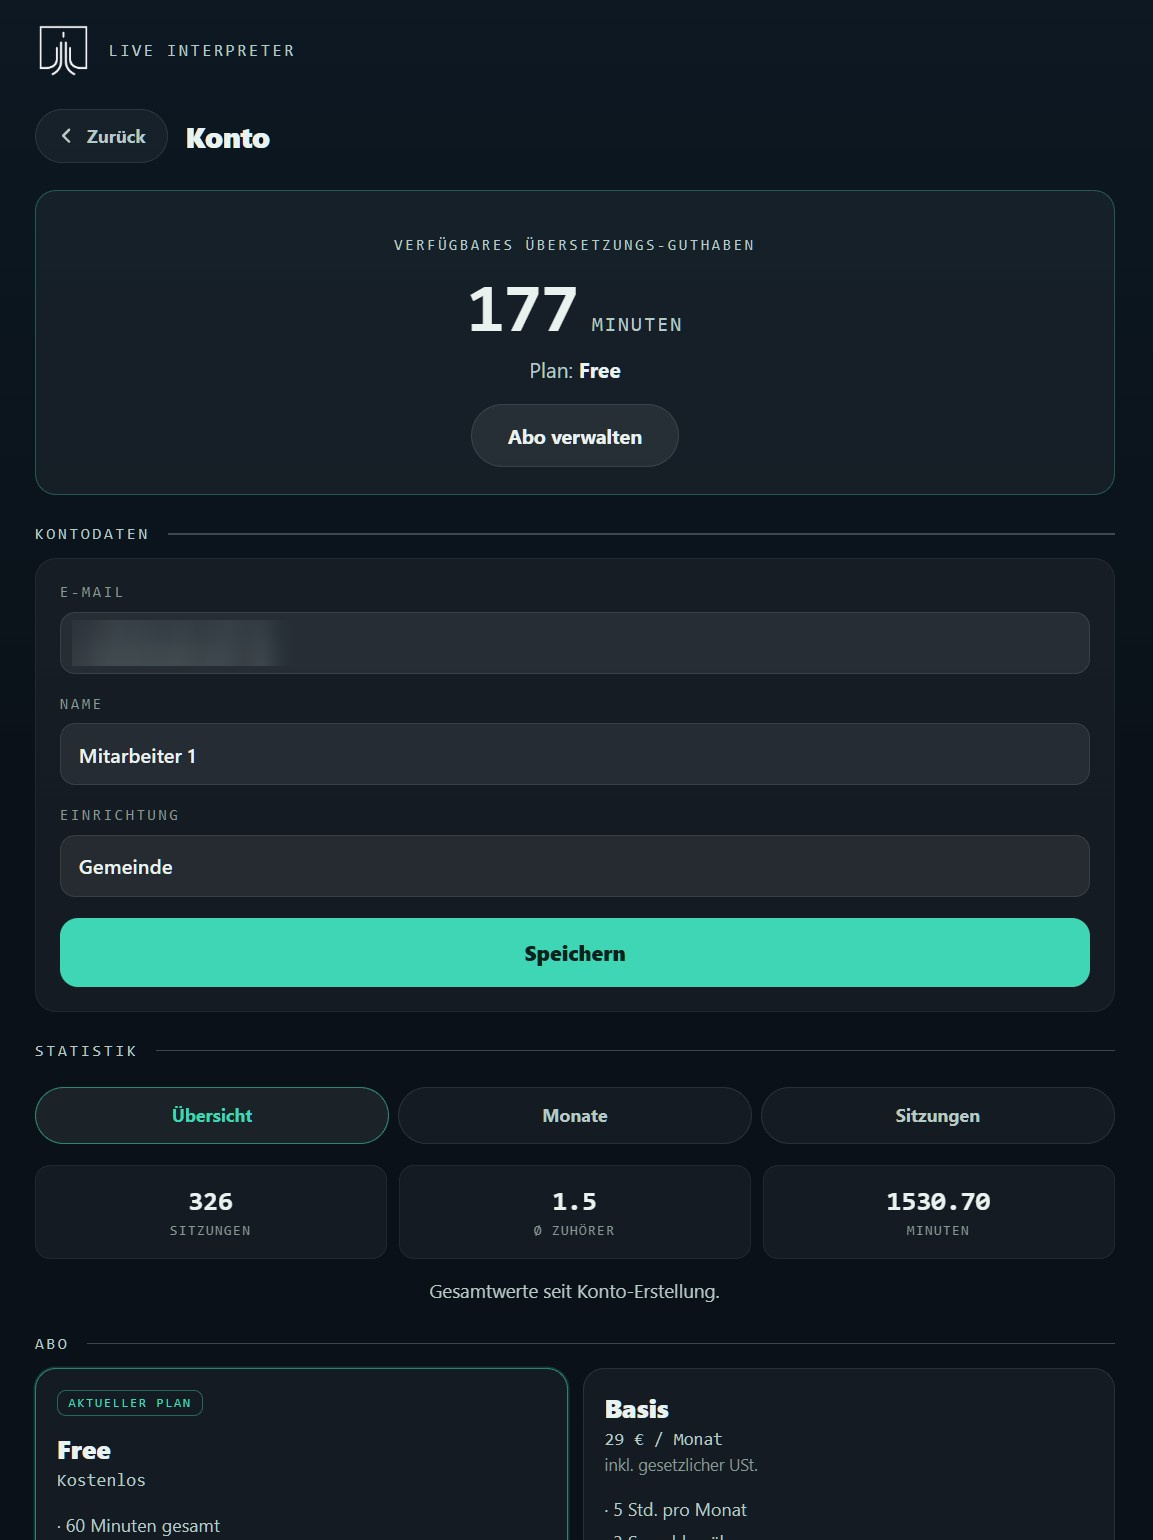
Here you see your remaining minutes, your current plan and the date on which your minutes are topped up again.
Account details
Here you can change your name and your organisation.
Your email address is also your login. The address is shown but cannot be changed directly. If it needs to change, please get in touch with us.
Statistics
Under Statistics you can see how much you have used so far, including:
- number of sessions
- average number of listeners
- minutes translated
You can view the data as an overall summary, by month, or by individual session.
Subscription
Here you see your current plan and the available plans with their minutes and language channels. You can switch plans or manage your existing subscription.
"Manage subscription" takes you to our payment provider, Stripe. There you can view your invoices and download them for your accounts.
Deleting your account
"Delete account" permanently deletes your account, all rooms, settings and staff logins. An existing subscription is cancelled as part of this. The step cannot be undone.
10 Before the event
A short test before you start prevents most problems. Allow a few minutes for it.
- Connect the microphone and select it in the sound check (section 3).
- Run the sound check and confirm that the meter shows "Signal good". Adjust the gain if it shows "Very quiet" or "Too loud".
- Check the incoming signal with headphones. The speech should arrive clearly and without disturbing background noise.
- Join as a listener with your own smartphone and run a short test translation.
- Check your internet connection. A stable Wi-Fi connection with good reception, or a wired connection, is ideal.
- Check under Account that you have enough credit for the planned duration.
- For multilingual events, reserve the languages you need in advance (section 8).
- Put up the QR code, show the presentation slide or hand out flyers (section 2).
11 Common questions and troubleshooting
- Tap the screen once. Some smartphones only allow audio playback after a user action.
- Check that "Sound on" is active.
- Check that a language has been selected.
- Turn the volume up and make sure silent mode is off.
- If there is still no sound, choose "Reconnect" or open the room again via the QR code or the room code.
You can also enter unusual names or specialist terms under terminology. With context you give Live Interpreter further information about your event (section 7).
With very fast speakers the gap can grow. Live Interpreter then tries to catch up automatically (section 7). A steady speaking pace and short, natural pauses between sentences help.
12 What to expect from AI translation
Live Interpreter can deliver very good translations; typical accuracy is somewhere between 85 and 95 per cent. Even so, an AI translation remains prone to error and cannot deliver mathematical perfection: language is always a matter of interpretation too.
Unlike a written translation, a live translation requires several steps to work in real time: what is spoken is recognised and written down, then translated, and finally spoken again in the target language. Each of these steps brings its own challenges.
Mixed languages
If a speaker drops in terms from another language, such as an English phrase like "customer journey" in the middle of a German talk, Live Interpreter usually handles it reliably. Misunderstandings can still happen occasionally, because speech recognition expects a word in the source language at that point.
Strong accents and dialects
The further pronunciation departs from the standard language, the harder automatic speech recognition becomes. A pronounced regional dialect can therefore lead to more recognition errors than standard speech.
Pronunciation of proper names
Names such as "Fraunhofer", "München" or "BMW" can appear correctly in the transcript and still be pronounced unusually by the voice. The reason: speech output follows the pronunciation rules of the target language.
At events with many proper names it can therefore be worth showing the transcript as well.
Audio quality and surroundings
The quality of the incoming signal has a large influence on the result. Background noise, a long distance to the microphone or poor room acoustics make speech recognition harder and therefore affect the translation too.
A clean, well levelled microphone signal is one of the most important conditions for good results (section 3).
Managing your listeners' expectations
Be open about the fact that the translation is produced automatically by AI and that mistakes can happen. Do not promise a translation that is entirely free of errors.
Where individual translation errors could have serious consequences, Live Interpreter should not be the only source of information.